Welcome to our Adobe Illustrator tutorial on creating 3D ribbons in Illustrator! This guide will demonstrate how to use Adobe Illustrator to make gorgeous 3D ribbons. With this method, you may give your designs depth and dimension to make them stand out from the competition. Use 3D ribbons to make eye-catching designs by following our detailed instructions.
First of all, select the Pencil tool. Choose a stroke colour. Fill colour is not needed.

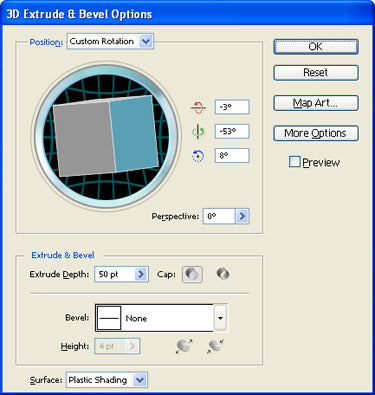
Choose 3D > Extrude & Bevel.

Select Front. Also choose Preview. Choose the side edge and turn. Now choose the top edge and turn. Change the Perspective slide to 143 degrees. Modify the Surface lighting by changing it to Diffuse Shading and move the light to the top area.

Here is the ribbon we created. But it is not the final image.

Using the Pencil Tool draw another design.

Go to 3D mode and set the set the values to the left of the box as shown below.

Put Extrude and Bevel to 10 pt.
As done before, move the lighting.

The ribbon will look as given below.

Make another line.

Go along with the settings below.


Here is the ribbon we created

Arrange the other items where you need them.


