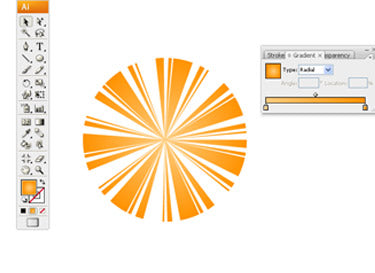
This tutorial will help you to draw sun rays in Adobe Illustrator. The one used here is CS3 version. But before you begin make sure that you have set Fill colour to None and Stroke colour to Black or the colour of your choice.
Step 1
Draw a circle. The one drawn below is 100 pixels in diameter.

Step 2
To bring up the Stroke Panel select Window>Stoke (Ctr+F10) and to view all the Stroke options click on the Show options.

Step 3
Now increase the Stroke Weight until you get a figure similar to the circle. For a circle with a diameter of 100 pixels a weight of 100 pixels will be sufficient.

Step 4
Click on the Dashed Line option and your Vector Sun Rays is ready. Want to make it look even better?

Step 5
Play around with the Dash/Gap Values. Try a 3-5-1 setting

Step 6
How about a 12-3-5-1-5 setting?
Before you use your custom sun rays make sure that you have expanded the circle with OBJECT>EXPAND in the menu bar. There you go! Your Vector Sun Rays are ready to be used.

Step 7
As you see, in less than a minute you can make some really cool retro sun rays for your background. If you want more depth then add a Radial Gradient in Illustrator. Now you have in hand a cool background to use in your next illustration.


