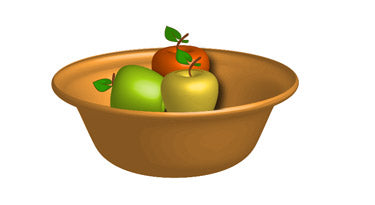
Learn how to create a realistic 3D bowl illustration using Adobe Illustrator with our guide. Our guide covers all the essential steps for creating a 3D bowl illustration that adds a professional and realistic touch to your designs.
1.Draw a Bowl
Make a path and fill it with yellow. Then, from the menu choose Effect > 3D > Revolve.

2.Apply 3D Revolve
Make the following changes to the settings of 3D Revolve Option:
• If the lower portion of the window is not displayed, click on More Options.
• Create a new light by clicking on the New Light icon and drag the two lights as shown.
• Change Shading Colour to orange by: selecting Custom from the drop, click on the sample colour box to open the Colour Picker window, then enter R=255B=50 G=0.
• To get a smooth blending, increase the Blend Steps (default is 25, max is 256). Note: Increasing Blend Steps will increase file size and memory usage.


3.Draw an Apple
Make an oval path using Ellipse Tool and fill green colour. Then, choose the green path and apply Effect > 3D > Revolve, leave all options in the 3D Revolve Option window as default and click OK. Now, you should get something like the image shown below:


4Add Drop Shadow
Select the apple path and navigate to Effect > Stylize > Drop Shadow and apply the setting as below.

5.Make New Art Brush
Make a path similar to the image below. Fill it with black (k=100). Create the highlight path and fill it with 80% black (k=80). Drag it to the Brush library window (Window > Brushes or press F5) to make a New Art Brush.
New Art Brush Options

The Art Brush Option window will appear. Choose Tints from the Colorization Method drop down menu. Leave the rest as default and click OK.
6.Draw the Stem of the Apple
Make a stroke path with the Pen Tool and choose the Art Brush that you have created in the previous step. Now place it on top of the apple like the image below.

7.Duplicate the Apple
Choose the apple (with stem) and hold the Alt (or Option key for Mac). Drag it to make a copy. You can also use Copy & Paste to duplicate the apple. Change the colour to red.

8.Adjust the Settings of 3D Revolve
Choose the red apple (oval path only). In the Appearance palate (Window > Appearance or press Shift+F6), double click on 3D Revolve effect icon to adjust the options.
3D Revolve Options
The 3D Revolve Option window will appear. Enter the following values: X=57, Y=63, Z=-159. You can change the rotation values manually by entering the numbers or by dragging the cube on the left.

9.Fix the Apple’s Stem
After rotation the stem position will be changed. To move the stem stroke to the centre of the apple, use the Selection Tool or Direct Selection Tool.
10.Add More Apples
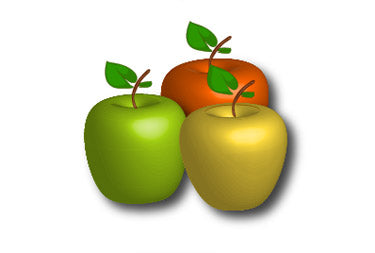
Make more apples by repeating Step 7 to 9.
11.Put Them Together
Put the apples and the bowl together as shown. Draw an oval shaped path on the shape of the bowl.

12.Mask the Apples
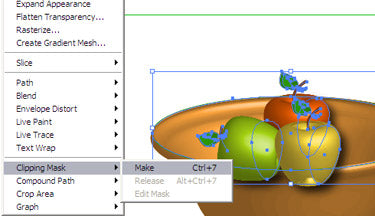
Choose the oval path of the apples and navigate to Clipping Mask > Make or press Ctrl+7
This will be the final image.
