Learn how to create a festive and colorful background using confetti and flower shapes in Illustrator. Discover tips and techniques for using the Pathfinder and Align tools to create a cohesive composition.
Let us begin with a rectangle with the size of the background (800 x 600). Create a gradient as shown below.
Using the gradient tool, create a new gradient. But you should have something in the fill.

Lock this layer and make a new one. Draw some squares and give different colours to each.

Select the squares and group them.

Open Free Distort.

To provide some depth, distort the confetti.
Choose each of the confetti and rotate them.

Then add the confetti to the Symbols palette and name it.

To change the Density to 5, double-click on the Symbol Sprayer Tool.
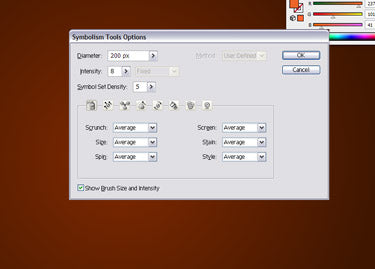
Now spray two or three times.

Choose the Symbol Shifter Tool and move the confetti around. To bring more changes use the Symbol Scruncher and Symbol Sizer Tools.
To rotate the confetti in different directions, use the Symbol Spinner Tool. If you want to make changes to the colour of the confetti, then use the Symbol Stainer.
To make the outer confetti more transparent, use the Symbol Screener.

Reduce the Opacity of the layer to 50%. Make a new layer for the birds. Now you need to drag and drop the symbol of the bird from the Symbols palette. Make copies and resize them. Reduce the Opacity of that layer to 50%. Your background is ready for use.


