Learn how to wrap text around an Easter egg in this Illustrator tutorial. Create a unique and festive design for your next holiday by adjusting the shape of the text box using the wrapping tools. Follow us to create your own custom Easter egg design!
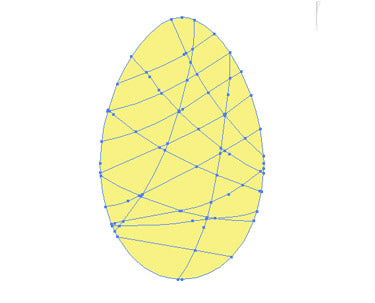
First, we have to create the egg shape. So, choose the Ellipse tool and draw a shape on the form of egg.

Using the Direct Selection tool, choose the point at the top of the egg. Hold the Shift key and drag it up. Then, use Alt +drag to duplicate it twice.
Select the knife tool and cut the egg.
Choose the Live paint tool. Make a patch work colour scheme.

Use a Feather radius of .5.

Apply Roughen with the parameters below.


Choose the second egg and go to Text Wrap>Make.
Click on the Type tool and start typing inside the egg. Press CTRL+T to bring the Text attributes palette. Centre the text by going to Paragraph. Make adjustments so that all the text will fit in the egg.
Drag the text to the egg art.

For the last egg, I have used the Text on the Path tool with the settings given below to type in a few texts.

Now draw two sideways hearts and make copies. By default, apply Scribble Option of Swash to it.
To emphasise the shape of the duplicated hearts, use an outline.


Use the Text Wrap and Text on a Path to create a nice text wrap image.